How to send Mailchimp predictive audiences from Flexsee Wizard Flow
Connect Mailchimp Transactional, pick a highest-intent Wizard Flow audience, and send per-recipient AI product recommendations with optional Handlebars templates.
Mailchimp Marketing audiences are great for list hygiene, but they do not rank which shoppers are most likely to buy which products from your live catalog. Flexsee closes that gap in Wizard Flow: sync Shopify (or WooCommerce), pass readiness, choose Mailchimp as the destination, and Flexsee prepares a product_recommendations audience automatically — then sends one Mailchimp Transactional email per selected recipient with personalized product picks.
This guide covers the Mailchimp branch end to end: connect Mailchimp Transactional (Mandrill), optional template Handlebars, audience selection, and activation from Wizard Flow. No manual model training — predictions and sends stay inside the wizard.
What you’ll accomplish
- Shopify synced under Integrations → Datasources with behavioral events for Wizard Flow readiness
- Mailchimp connected under Integrations → Marketing Destinations → Email & SMS with a Transactional API key
- An optional Mailchimp Transactional template that renders
flexsee_recommendations - A Wizard Flow with Mailchimp destination, highest-intent audience selection, and Send email activation
- Per-recipient emails with 2–6 ranked products from the same prediction pipeline used for Klaviyo sends
Prerequisites
Before you begin, make sure you have:
- A Flexsee account with an active commerce data source subscription (Shopify or WooCommerce)
- A synced store with products, orders, and customers — see How to connect Shopify and Flexsee in 10 minutes if needed
- Flexsee AI Predictions pixel enabled and 11+ behavioral events for Wizard Flow readiness
- A Mailchimp account with Mailchimp Transactional (Mandrill) and an API key (Transactional → Settings → API Keys)
- Recipient profiles in Flexsee with valid email addresses for the audience you plan to send
Klaviyo is not required. If you also use Klaviyo, see How to add AI product recommendations to Klaviyo for the metric-triggered path.
Step 1 — Connect Shopify and confirm readiness data
In this step, you will confirm Flexsee has catalog, order, and event data for predictions.
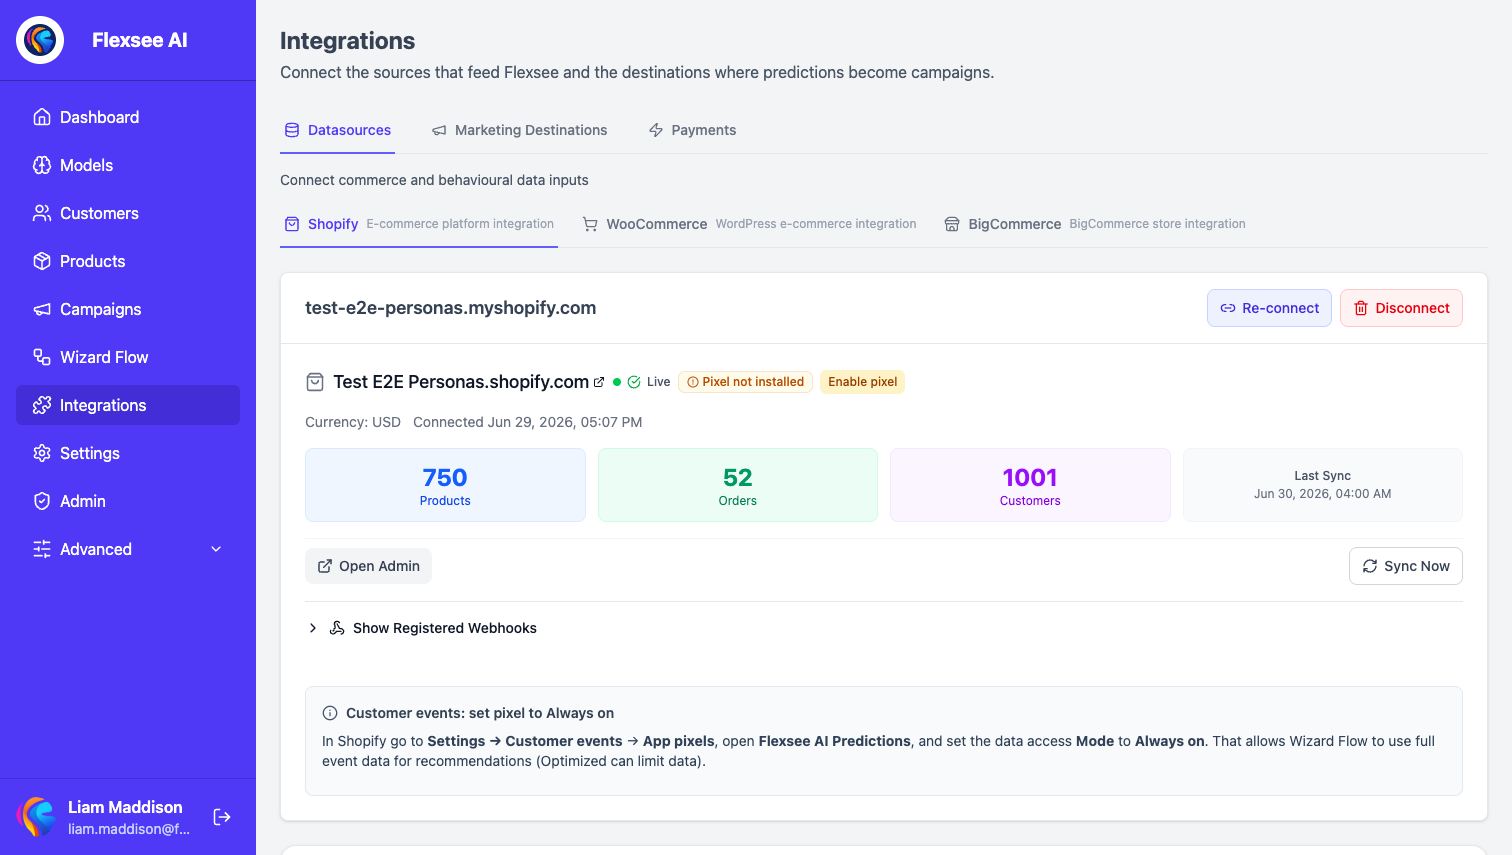
- Sign in to the Flexsee dashboard.
- Open Integrations → Datasources → Shopify (
/integrations/datasources/shopify). - Verify your store card shows Synced with non-zero Products, Orders, and Customers.
- Enable the Flexsee AI Predictions pixel if needed, then browse your storefront to generate events.
- Confirm Behavioral events (for first model) shows Ready to train (11+ events).
Wizard Flow uses this data when it prepares recommendations on the audience step — you do not train a model separately.
Step 2 — Connect Mailchimp Transactional in Flexsee
In this step, you will authorize Mailchimp so Flexsee can list templates and send campaign emails.
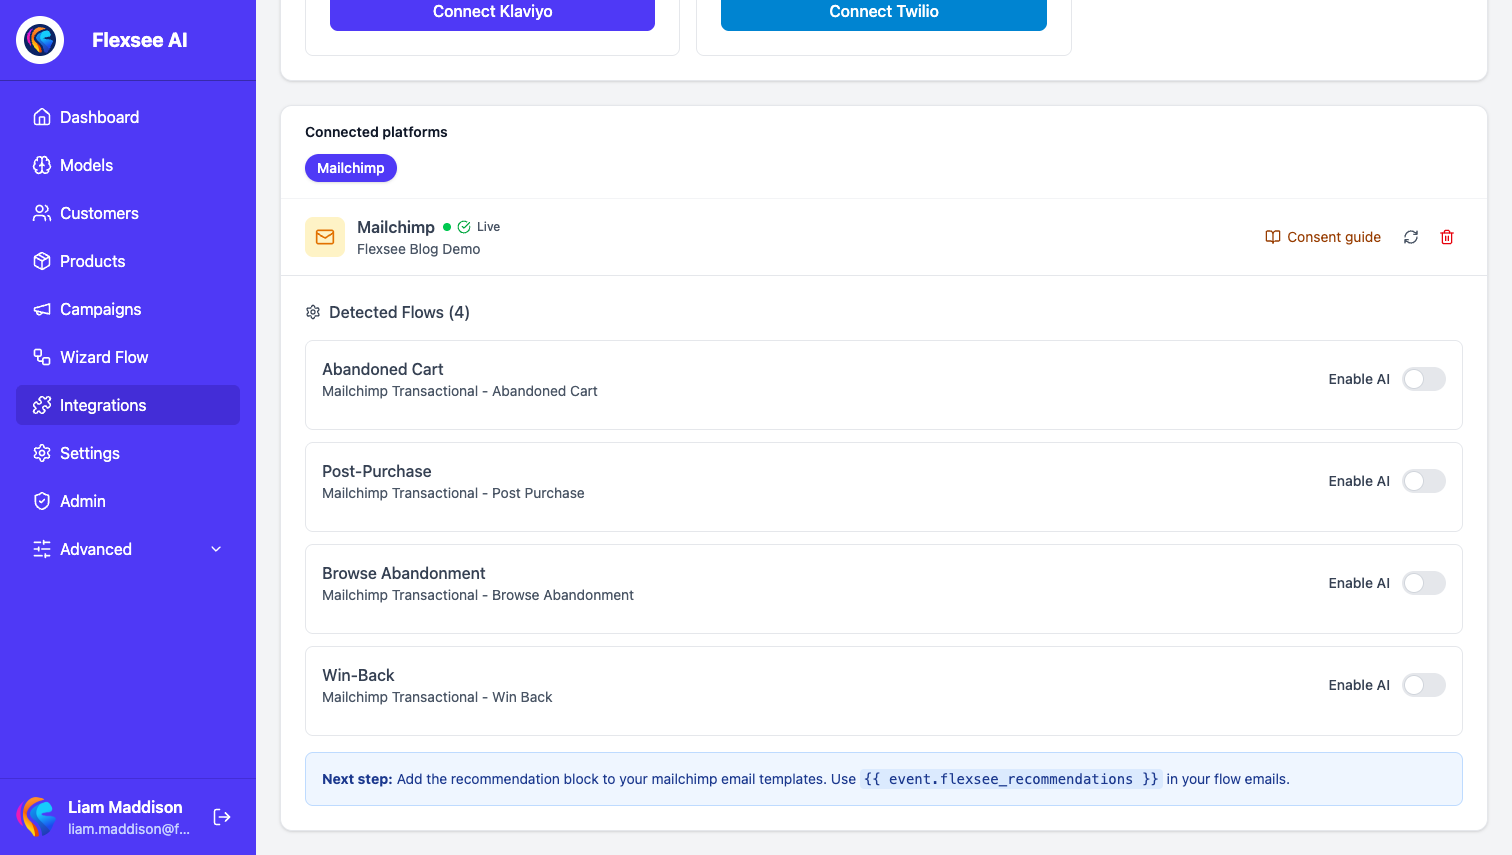
- Open Integrations → Marketing Destinations → Email & SMS (
/integrations/marketing). - Find the Mailchimp card — Send AI recommendations into your Mailchimp transactional flows.
- Click Connect and paste your Mailchimp Transactional API key (Mandrill key from Transactional → Settings → API Keys).
- Save and wait for Flexsee to verify the key and show the integration as active.
Flexsee uses Mailchimp Transactional for Wizard Flow sends — one transactional email per recipient with merge variables for recommendations. Standard Mailchimp Marketing automations are not required for this path.
Step 3 — Add recommendation Handlebars to a Mailchimp template (optional)
In this step, you will prepare a template so product blocks render with images, titles, and prices.
If you skip this step, Flexsee sends using its fallback recommendation layout when you choose Use Flexsee fallback layout in the wizard.
- In Mailchimp Transactional, create or edit a template.
- Add a Handlebars block that loops
flexsee_recommendationswhenflexsee_has_recommendationsis true. - In Flexsee Integrations → Marketing Destinations, open your Mailchimp integration and copy the sample Handlebars block from the integration card (image + title + price layout).
Merge variables Flexsee sends on each campaign email:
| Variable | Purpose |
|---|---|
first_name | Recipient first name |
last_name | Recipient last name |
flexsee_recommendations | Array of products (title, url, imageUrl, price, productId, rank) |
flexsee_has_recommendations | Use in {{#if}} to hide empty blocks |
After saving the template in Mailchimp Transactional, Flexsee lists it in the Mailchimp template dropdown during Destination setup.
Step 4 — Start Wizard Flow and choose Mailchimp
In this step, you will open the guided flow and select Mailchimp as the destination.
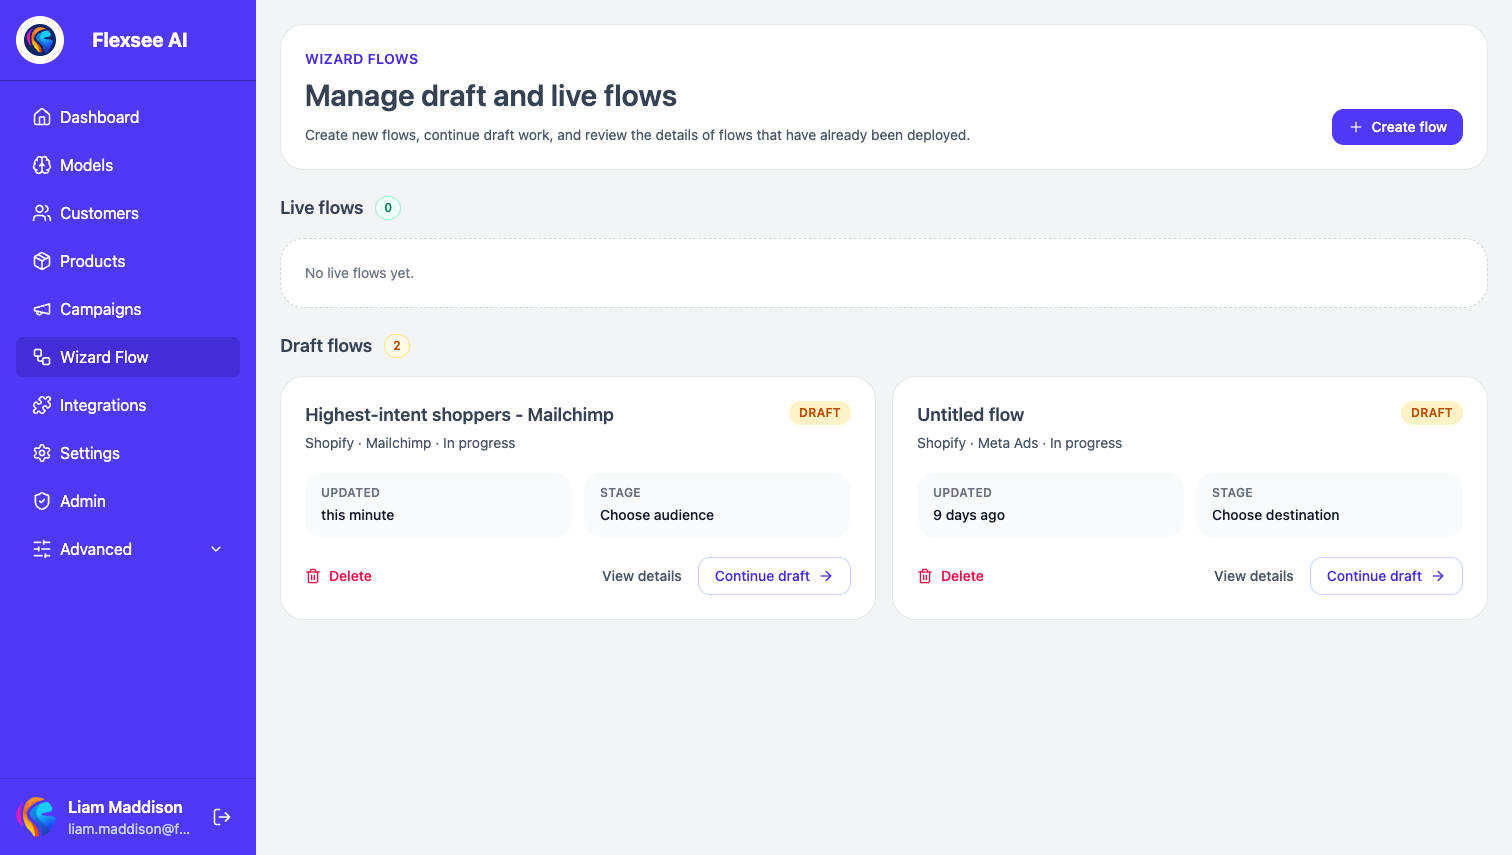
- Open Wizard Flow (
/wizard-flow) and click Create flow. - Select Shopify (or WooCommerce) as the data source and pass Readiness — store connection, sync, and 11+ events.
- On Destination, read the callout: email branches focus on audience first; product picks happen in the send step.
- Select Mailchimp — shown as a Transactional email option on the destination card.
- If status shows Connect required, click Set up Mailchimp and complete Step 2 before continuing.
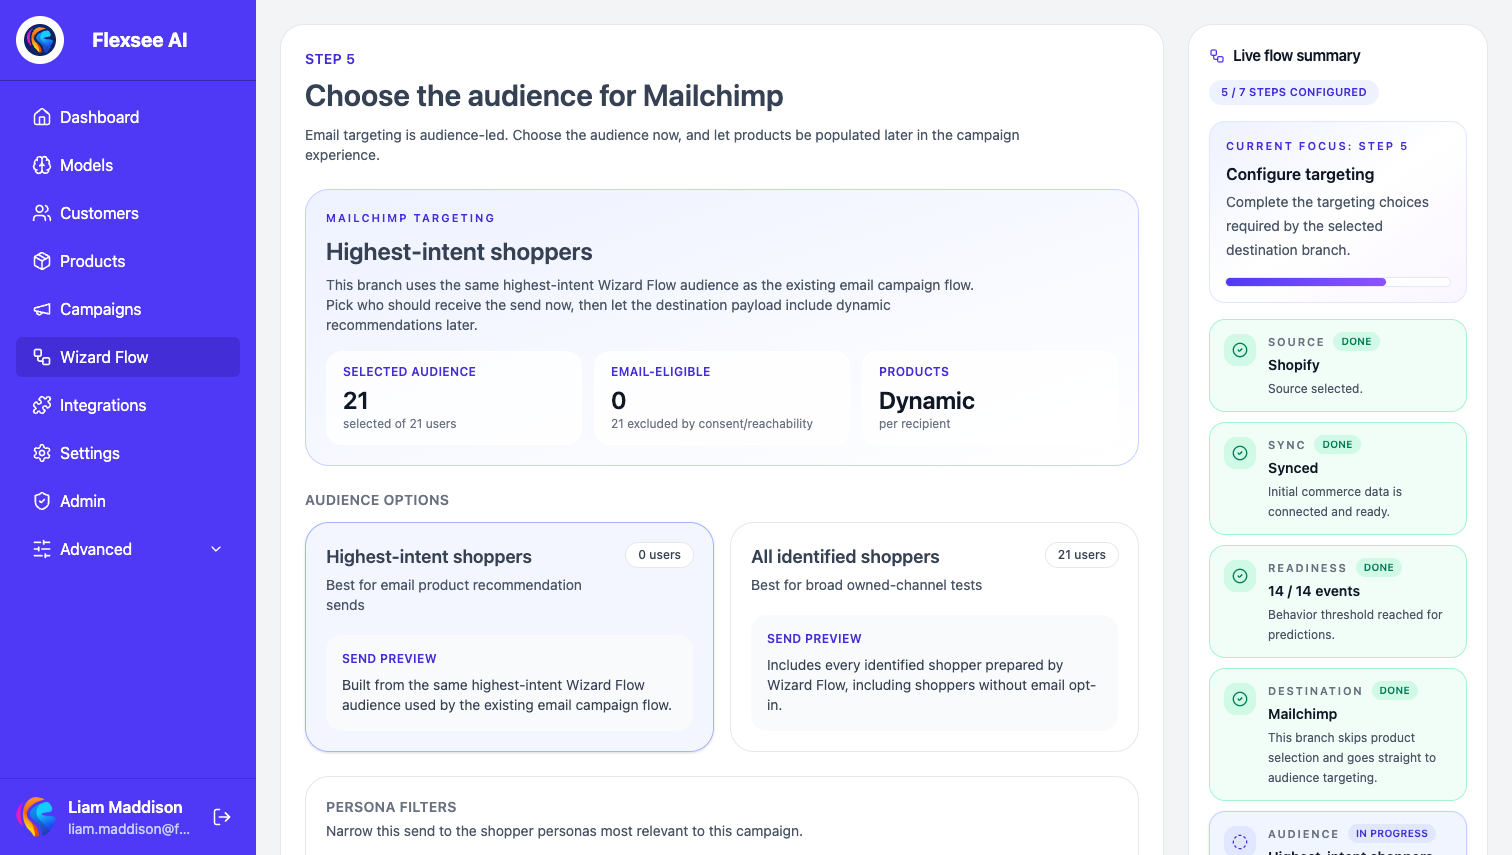
Step 5 — Select the predictive email audience
In this step, Flexsee prepares recommendations and shows who to include in the send.
- On Targeting (audience step for email destinations), Flexsee prepares a product_recommendations model for your store if one is not already available — wait until the highest-intent audience loads.
- Review the highest-intent Wizard Flow shopper list with reachable email addresses.
- Toggle individual recipients on or off — only selected profiles receive the Mailchimp send.
- Confirm the sidebar shows how many email-ready recipients you selected before moving to Destination setup.
Unlike the Meta Ads branch, Mailchimp does not ask you to pick a single SKU on this step. Flexsee ranks next-best products per recipient from the same model used for Klaviyo Campaign Send.
Step 6 — Configure Mailchimp send and activate
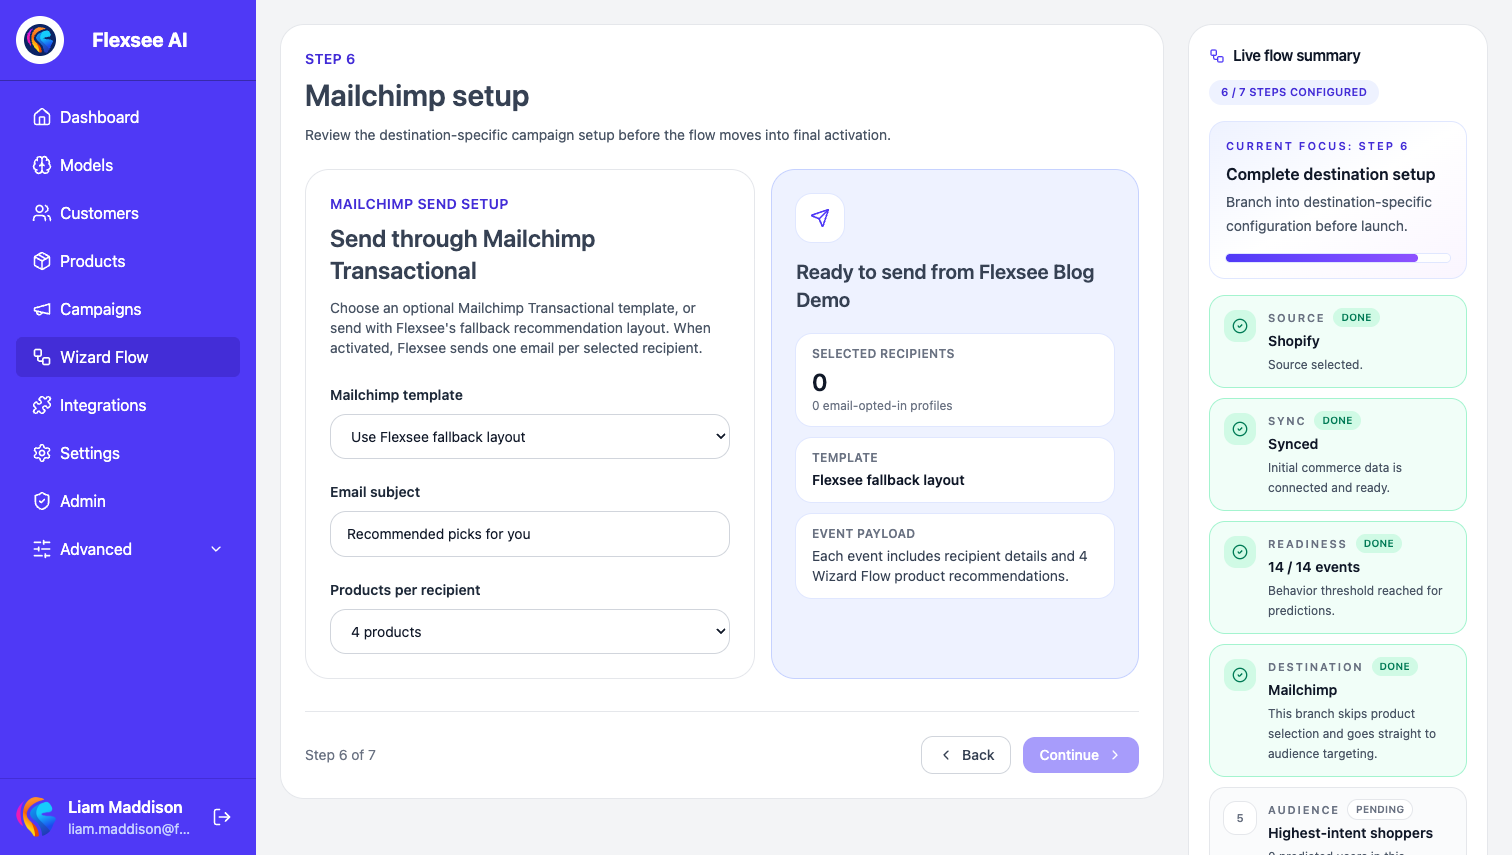
In this step, you will set template, subject, and product count, then send.
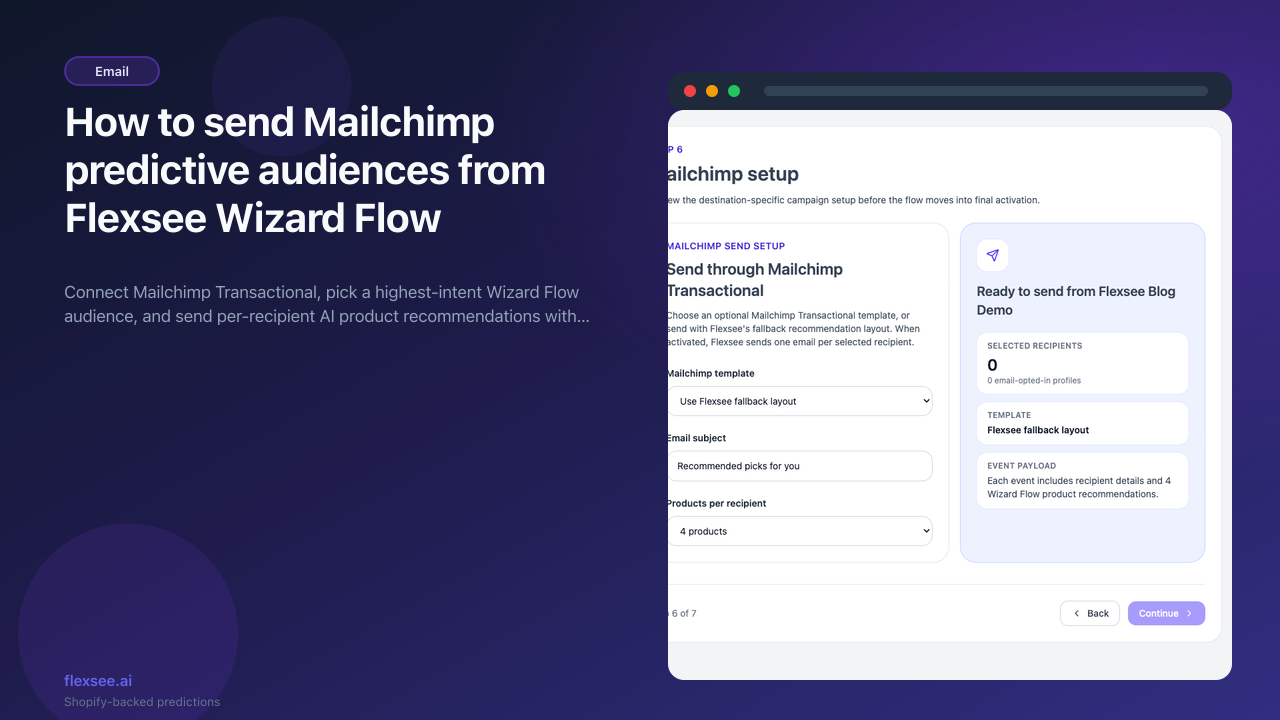
- On Destination setup, open Mailchimp send setup → Send through Mailchimp Transactional.
- Under Mailchimp template, pick a Transactional template or leave Use Flexsee fallback layout.
- Set Email subject — this is the subject line on each transactional message.
- Set Products per recipient (2–6) — Flexsee ranks that many items per profile from your store catalog.
- Review the summary, then continue to Activate and choose Send email.
Flexsee sends one Mailchimp Transactional message per selected recipient with tracked product URLs and recommendation metadata for attribution. Open the flow details page to monitor send progress and campaign performance.
Mailchimp vs Klaviyo in Flexsee
| Mailchimp (Wizard Flow) | Klaviyo (Wizard Flow) | |
|---|---|---|
| Send mechanism | Mailchimp Transactional API (direct email) | Flexsee Campaign Send metric → your Klaviyo flow |
| Template setup | Mandrill template + Handlebars merge vars | Klaviyo flow email HTML with event properties |
| Flow picker | Mailchimp template dropdown | Klaviyo flow dropdown (metric-triggered) |
| Audience step | Same highest-intent Wizard Flow shoppers | Same highest-intent Wizard Flow shoppers |
| Recommendations | Per-recipient flexsee_recommendations | Per-recipient flexsee_recommendations on the event |
Pick Mailchimp when you already send transactional mail through Mandrill. Pick Klaviyo when you want lifecycle flows triggered by a Klaviyo metric.
FAQ
Do I need Mailchimp Marketing or just Transactional?
Wizard Flow campaign sends use Mailchimp Transactional (Mandrill). A Marketing account is fine, but the API key must come from the Transactional product.
Do I need to train a model before Wizard Flow?
No. Flexsee prepares product_recommendations during the Wizard Flow audience step when needed. Stay on the step until the audience finishes loading.
What if no templates appear in the dropdown?
Confirm the integration is active and the API key has template list permissions. Create at least one template in Mailchimp Transactional, then refresh Destination setup.
Can I send to subscribers without Shopify opt-in?
Flexsee only includes profiles with email addresses it can see from your connected store and integrations. Follow consent requirements for your market — see How to grow email marketing opt-ins.
How is this different from Mailchimp predictive segments?
Mailchimp’s built-in predictive segments use Mailchimp’s own models on your audience. Flexsee uses your Shopify catalog, orders, and pixel events, then sends ranked products per recipient from Wizard Flow — useful when your source of truth is the storefront, not just the ESP list.
Conclusion
Mailchimp predictive audiences in Flexsee start in Wizard Flow: sync your store, connect Mailchimp Transactional, pass readiness, choose Mailchimp as the destination, select highest-intent shoppers, and configure template, subject, and Products per recipient before Send email. Optional Handlebars templates give you brand control; the fallback layout works for a first test send.
Comments