How to add AI product recommendations to Klaviyo
Connect Shopify and Klaviyo in Flexsee, create a metric-triggered Klaviyo flow for Flexsee Campaign Send, and send personalized product picks from Wizard Flow.
Personalized product blocks in email lift click-through and repeat purchases. This tutorial shows the primary Flexsee path: connect Shopify and Klaviyo, train a model, wire a Klaviyo flow to the Flexsee Campaign Send metric, then send from Wizard Flow so each recipient gets model-backed recommendations in one click.
When you finish, you will have Klaviyo connected, a live metric-triggered flow, and a Wizard Flow that sends Flexsee Campaign Send events with flexsee_recommendations on every selected profile.
What you’ll accomplish
- Shopify + Klaviyo connected in Flexsee with customers syncing for email eligibility
- A Klaviyo flow triggered by Flexsee Campaign Send with a template that renders
event.flexsee_recommendations - A Wizard Flow email campaign: predictive audience, subject line, products per recipient, and Send email
Prerequisites
Before you begin, make sure you have:
- A Shopify store with products and enough order history to train a useful model
- A Klaviyo account with API access and permission to create flows
- A Flexsee account and access to Wizard Flow
You do not need a Flexsee API key for the Wizard Flow send path. API keys are only required if you call the Predictions API from your own server.
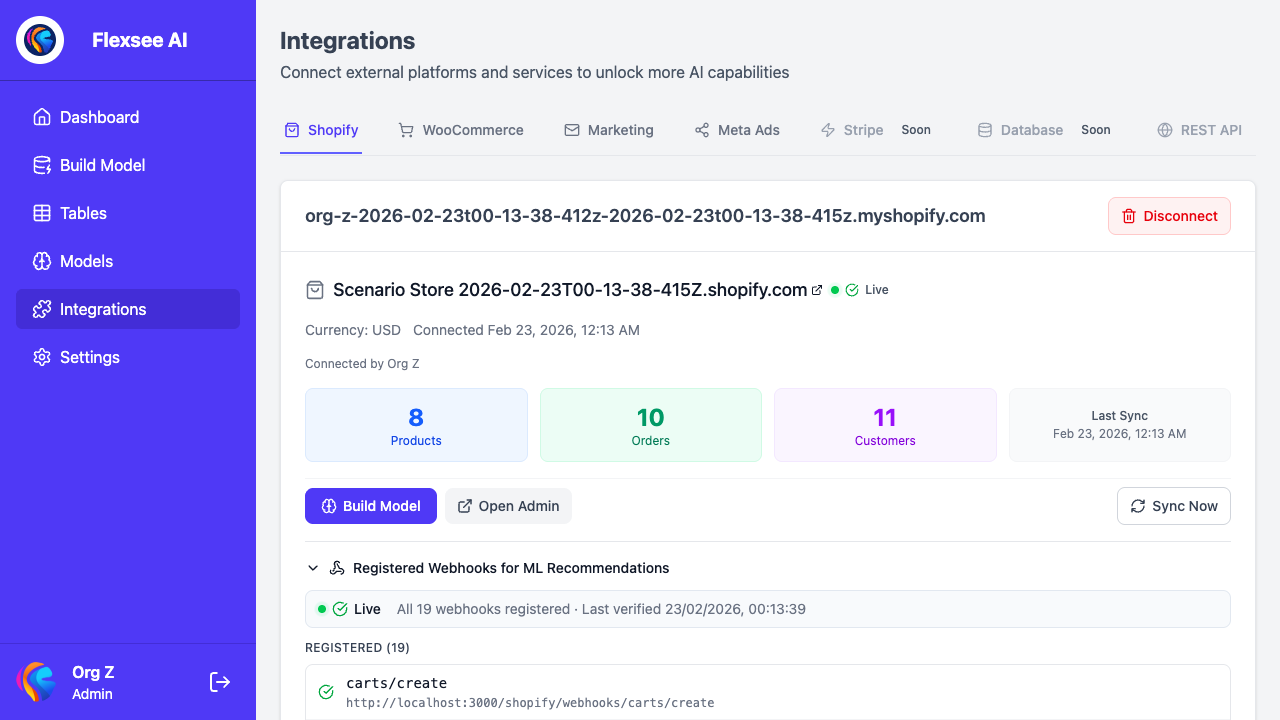
Step 1 — Connect Shopify and train a model
In this step, you will sync catalog and order data and train the model that powers recommendations.
- In the Flexsee dashboard, open Integrations → Datasources and connect Shopify.
- Wait for the initial product and order sync to finish.
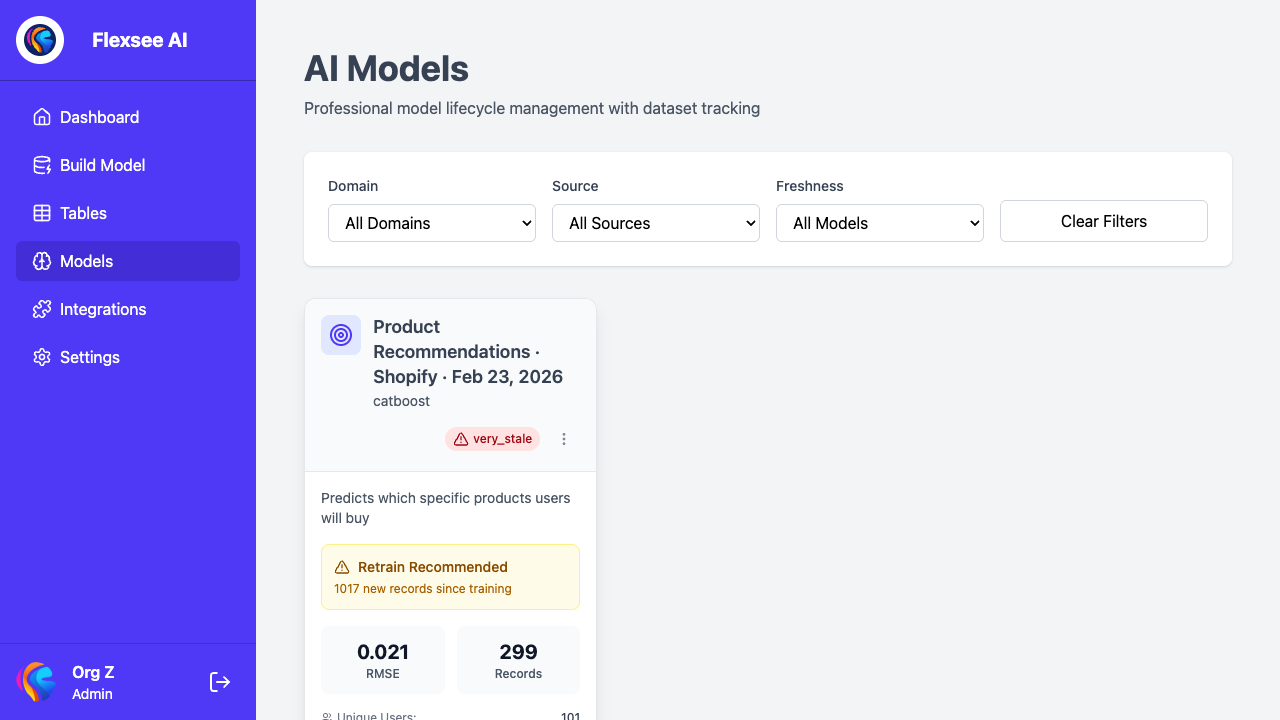
- Open Models, create a model suited to email (for example frequently bought together or personalized picks), and start training.
- Leave training in Complete before you send—empty or weak predictions mean sparse recommendation blocks.
Order and product history in Flexsee is what the send pipeline uses to rank products per recipient.
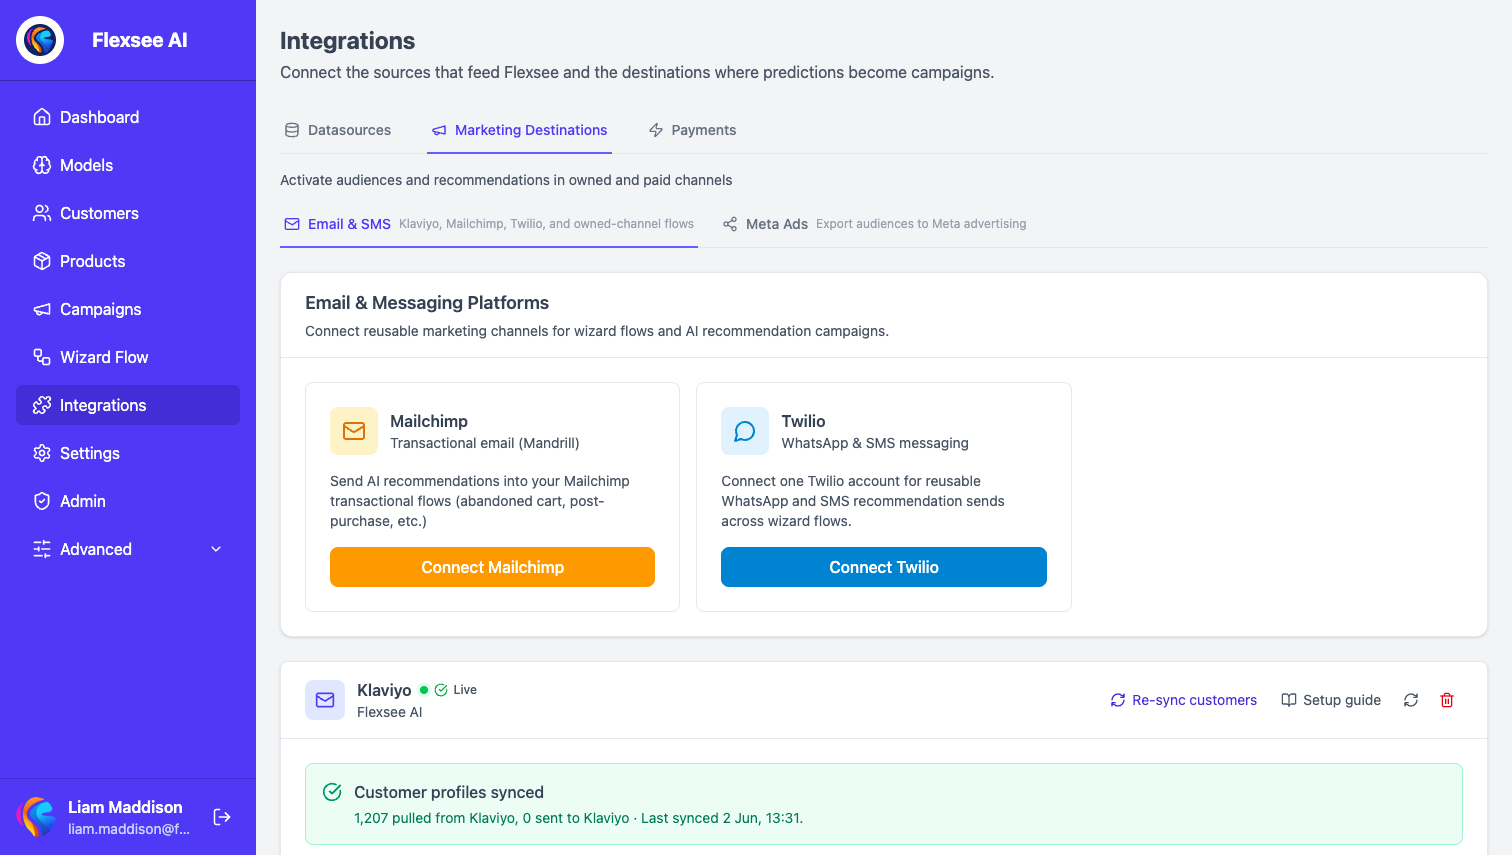
Step 2 — Connect Klaviyo in Flexsee
In this step, you will authorize Klaviyo and confirm the integration is ready for campaign sends.
- Go to Integrations → Marketing Destinations → Email & SMS.
- Connect Klaviyo with your private API key (Flexsee stores it securely for sends and flow discovery).
- Use Retry customer sync if prompted—Wizard Flow only sends to profiles with email and marketing consent Flexsee can see.
- Optional: open the in-app Klaviyo walkthrough from the same page for step-by-step screenshots of creating the metric flow in Klaviyo.
Flexsee lists Klaviyo flows that are triggered by Flexsee Campaign Send when you configure a Wizard Flow send.
Step 3 — Create the Flexsee Campaign Send flow in Klaviyo
In this step, you will build the Klaviyo side before your first Wizard Flow send. Flexsee does not send bulk email itself—it fires one Track event per recipient; your Klaviyo flow delivers the message.
- In Klaviyo, go to Flows → Create Flow → Create from scratch.
- Add a Metric trigger and choose or create the metric Flexsee Campaign Send (created automatically on the first event if missing).
- Add an Email action after the trigger.
- In the email template, use event properties Flexsee includes on every send:
| Variable | Description |
|---|---|
{{ event.first_name }} | Recipient first name |
{{ event.last_name }} | Recipient last name |
{{ event.subject }} | Subject from Wizard Flow Email subject |
{{ event.flexsee_recommendations }} | Array of recommended products |
{{ event.flexsee_has_recommendations }} | Use in {% if %} to hide the block when empty |
Each recommendation includes productId, title, imageUrl, url, price, and rank.
- Paste the Picked Just For You HTML block from Klaviyo email campaign docs or from the Flexsee Klaviyo walkthrough.
- Set the flow Live when you are ready to receive production sends.
Full Klaviyo template examples: Klaviyo email campaign setup.
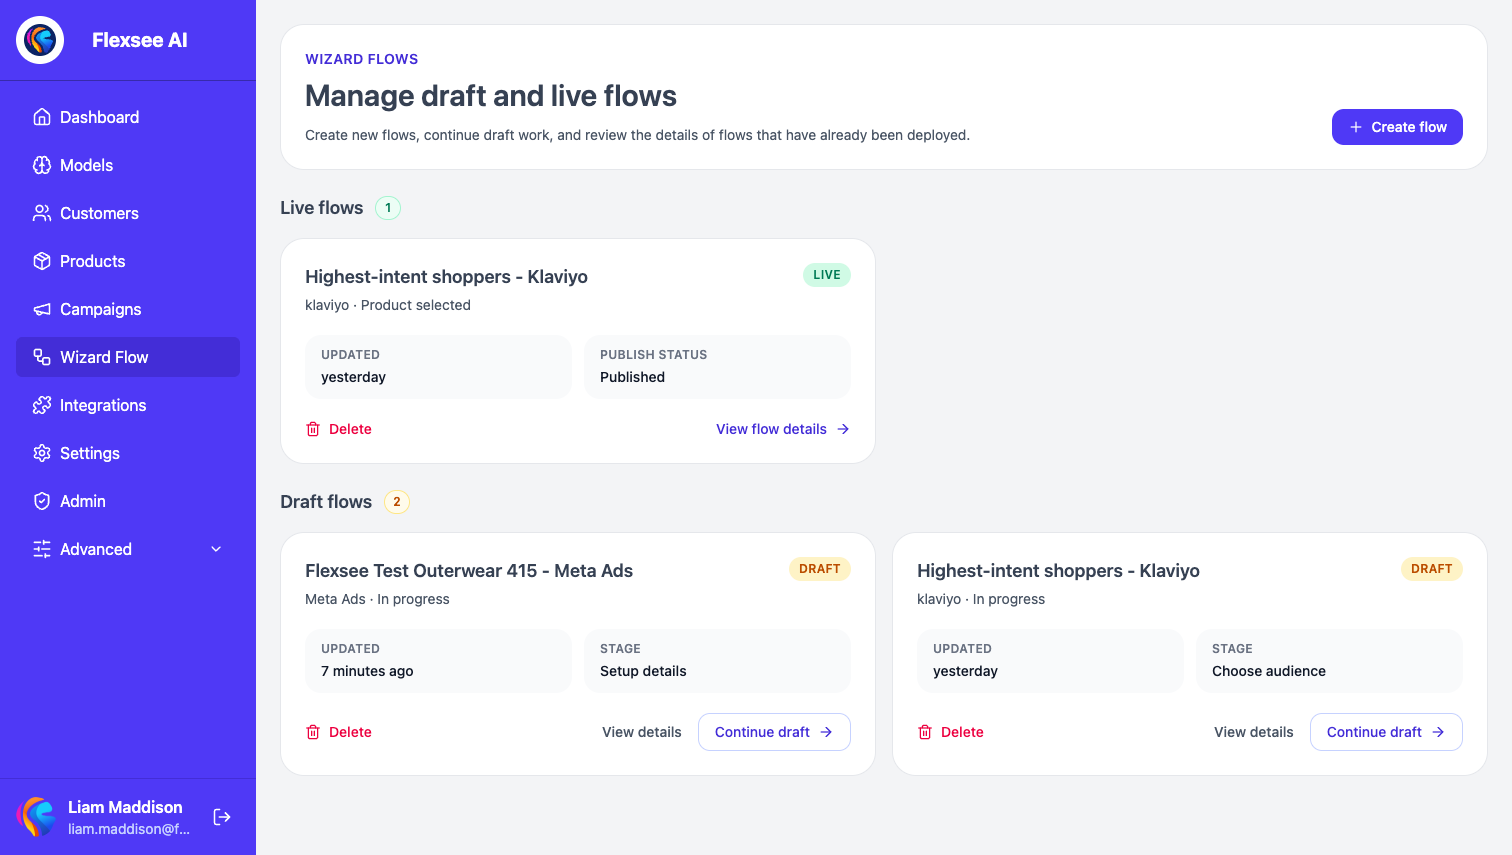
Step 4 — Start a Wizard Flow for Klaviyo
In this step, you will create the Flexsee campaign that selects who receives the send and which Klaviyo flow fires.
- Open Wizard Flow and start a new flow (or edit an existing Klaviyo destination flow).
- Confirm Shopify data source and a trained model on the readiness steps.
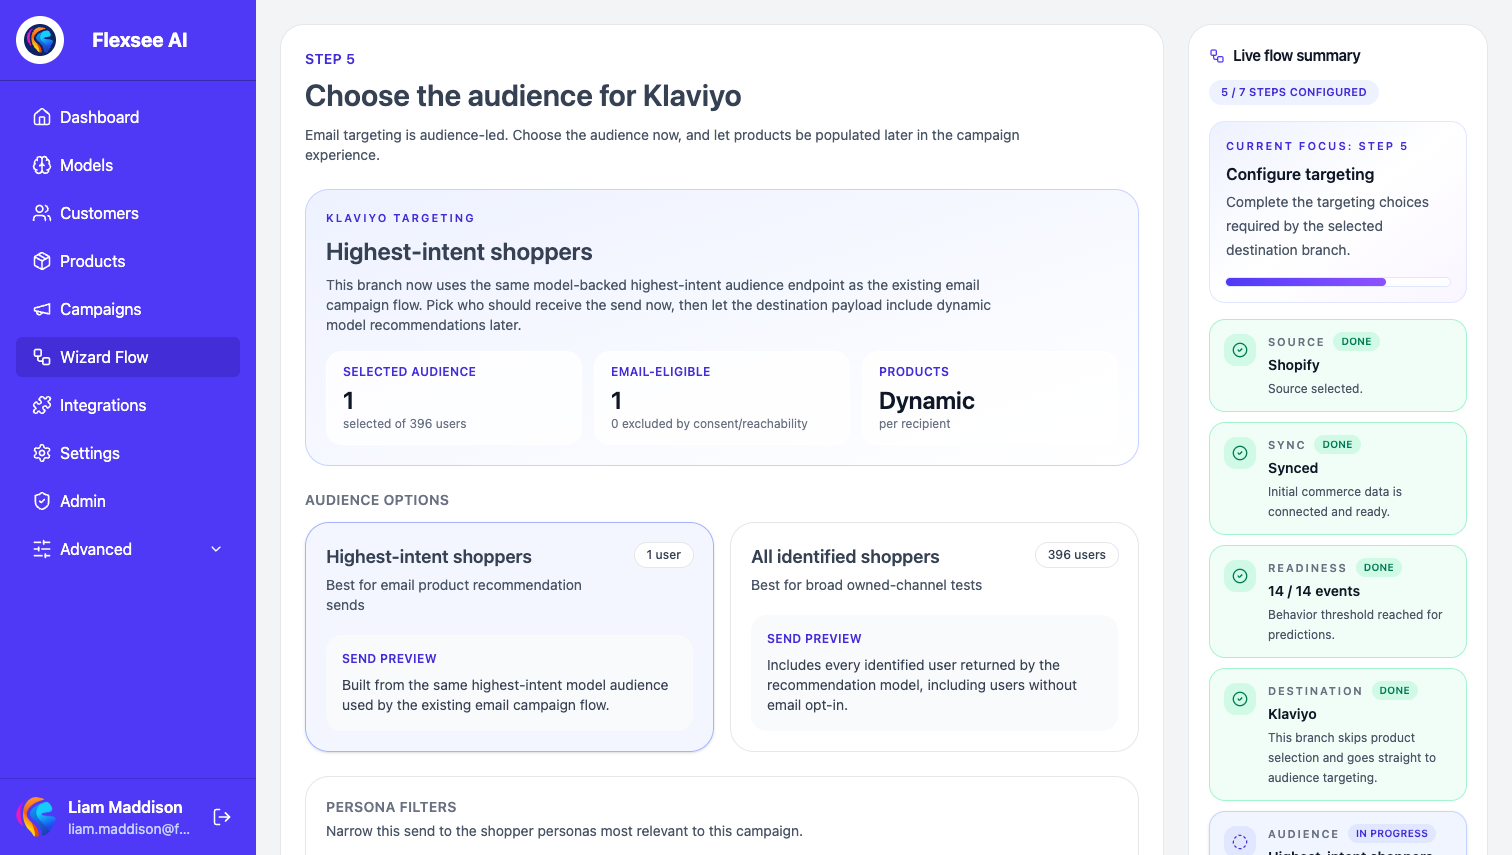
- Choose Klaviyo as the destination.
- On Choose audience, pick a predictive segment (for example highest-intent shoppers) and toggle individual recipients—you only send to opted-in emails Flexsee lists.
- Continue to Klaviyo send setup.
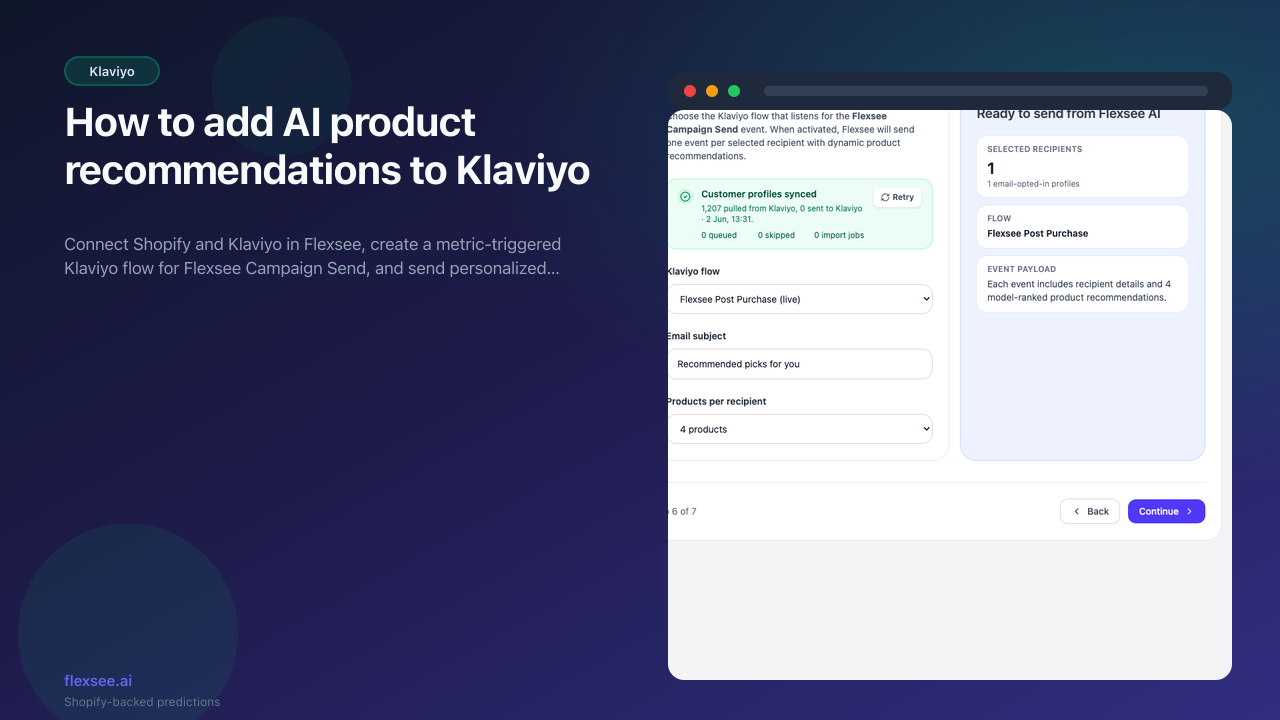
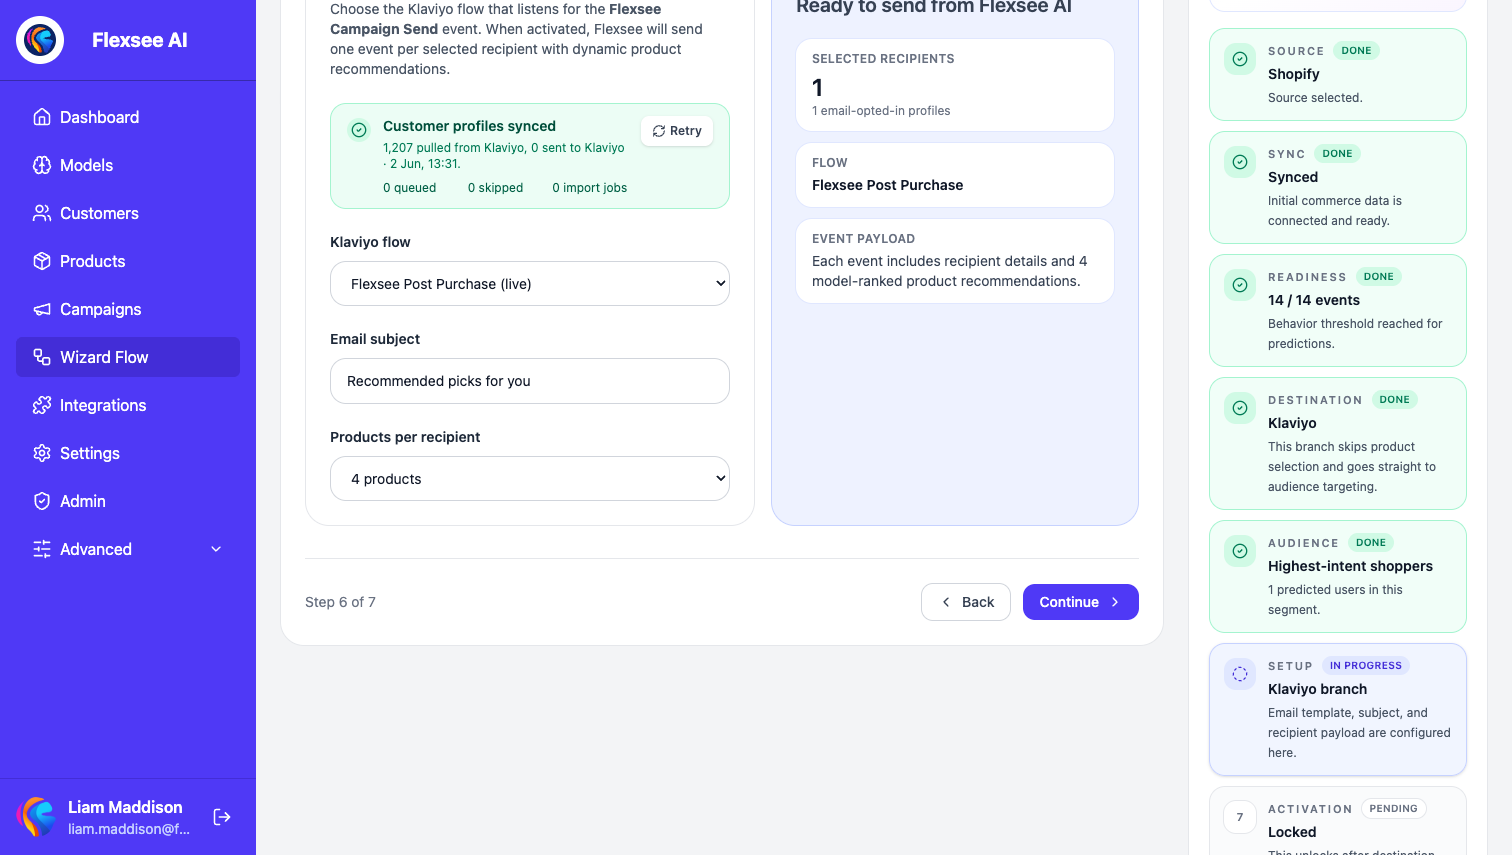
Step 5 — Configure send and activate
In this step, you will bind the Klaviyo flow, subject, and product count, then send.
- Under Klaviyo send setup, open Trigger the Flexsee campaign flow.
- In Klaviyo flow, select the flow that listens for Flexsee Campaign Send (only flows with that trigger appear).
- Set Email subject—this is passed as
event.subjectin Klaviyo. - Set Products per recipient (2–6); Flexsee ranks that many items per profile from your model.
- Review the summary sidebar, then continue to Activate and choose Send email.
Flexsee sends one Flexsee Campaign Send Track event per selected recipient with recommendations in the payload. Your Klaviyo flow must be Live and tied to that metric.
Step 6 — Verify delivery
In this step, you will confirm events and email content before scaling audience size.
- Send to a small test audience first (include your own opted-in email).
- In Klaviyo Analytics → Metrics, confirm Flexsee Campaign Send events for those profiles.
- Open the received email: product images, links, and titles should match your Shopify catalog.
- In Flexsee, open the Wizard Flow details page to see send progress and per-recipient status when available.
If the metric appears but the email does not send, check that the correct Klaviyo flow is selected and Live, and that the template uses event.flexsee_recommendations (Django syntax in Klaviyo HTML blocks).
Optional — Post-purchase flows with enriched Placed Order events
Some merchants also enable event enrichment so Flexsee attaches recommendations to standard Klaviyo commerce metrics (for example Placed Order after checkout). That path is separate from Flexsee Campaign Send:
- Configure enrichment in Flexsee integrations when you want automated post-purchase triggers.
- In Klaviyo, trigger the flow on Placed Order and read the same
flexsee_recommendationsproperties on the event.
Wizard Flow campaign sends remain the best fit for one-off or scheduled promotional emails with an explicit audience and subject. Use enrichment when you want every order to optionally carry recommendations without running Wizard Flow each time.
Frequently asked questions
No recommendations in the email
Confirm the model finished training, the profile received Flexsee Campaign Send, and the template loops event.flexsee_recommendations. Check event.flexsee_has_recommendations if you use a conditional block.
Klaviyo flow dropdown is empty
Create a metric-triggered flow in Klaviyo whose trigger is Flexsee Campaign Send, then refresh Wizard Flow. Flexsee only lists flows Klaviyo reports for that metric.
Recipients missing from the audience step
Run Retry customer sync on the Email & SMS page. Wizard Flow requires email plus marketing consent Flexsee can read from Klaviyo/Shopify.
Wrong flow fired
If you have multiple Flexsee Campaign Send flows, pick the intended one in Klaviyo flow before sending—Flexsee targets the flow you select, not every flow on that metric.
See also
- Product update: Klaviyo Campaign Send with AI recommendations — Wizard Flow triggers Klaviyo flows with per-customer product picks from your Shopify-trained model.
Conclusion
You connected Shopify and Klaviyo in Flexsee, trained a recommendation model, created a Flexsee Campaign Send flow in Klaviyo, and sent personalized product picks from Wizard Flow. That pattern scales to larger audiences and repeats whenever you launch a new promotional send.
Comments