How to add AI product recommendations to Klaviyo
Personalized product recommendations in email can lift conversion and average order value. This guide walks you through connecting Flexsee to your Shopify store and Klaviyo so that post-purchase flows (and other flows) use AI-powered recommendations instead of static product blocks.
What you’ll get
- Post-purchase emails that recommend products based on what the customer just bought and their history.
- Flow triggers driven by Flexsee’s “Placed Order” (and related) metrics so Klaviyo knows when to send.
- Recommendation blocks in your templates that call Flexsee’s API so each send is personalized per recipient.
You’ll need: a Shopify store, a Klaviyo account, and a Flexsee account (sign up at dashboard.flexsee.ai).
Prerequisites
Before you start, make sure you have:
- Shopify store with products and (ideally) some order history so Flexsee can train a model.
- Klaviyo account with your store connected and at least one flow (e.g. Post-Purchase) that you’re happy to clone or edit.
- Flexsee account and access to the Flexsee dashboard.
If your store is new, you can still connect Flexsee and Klaviyo; recommendations will improve as more orders come in.
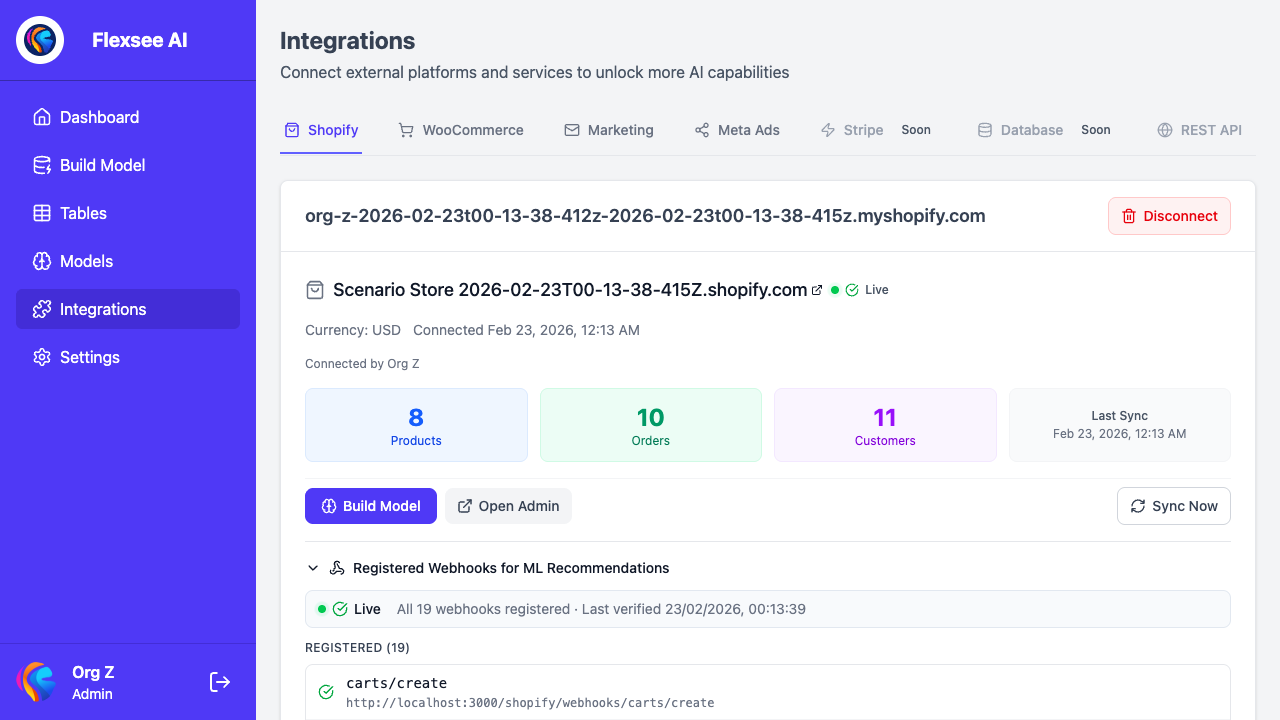
Step 1: Connect Shopify to Flexsee
- In the Flexsee dashboard, go to Connections (or Stores) and add your Shopify store.
- Complete the OAuth or install flow so Flexsee can read:
- Products (title, handle, image, etc.)
- Orders (line items, customer, timestamp)
- Customers (where allowed by your setup and privacy policy)
- Run or wait for the initial sync. Flexsee will backfill products and historical orders so it can train a recommendation model.
- Confirm in the dashboard that products and orders are visible. If something is missing, check connection permissions and sync status.
This data is required for Flexsee to generate “customers who bought X also liked Y”–style recommendations and to support Klaviyo triggers.
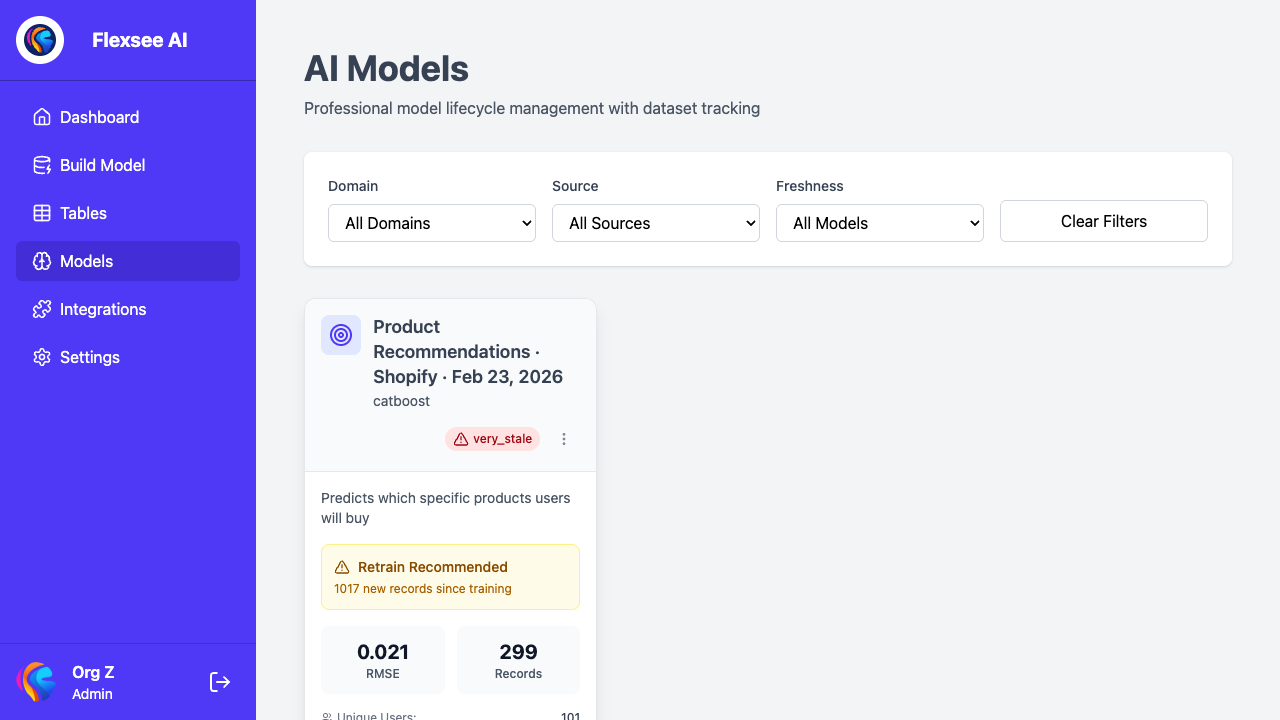
Step 2: Create and train a recommendation model
- In Flexsee, open Models (or Recommendations).
- Create a new model and choose a type that fits email use cases (e.g. “frequently bought together”, “similar products”, or “for you”).
- Select the catalog and events (e.g. products + orders) to use for training.
- Start training. Training time depends on catalog and order volume; the dashboard will show progress.
- When training finishes, note the model name or ID. You’ll use this in the Flexsee API and (if applicable) in Klaviyo when calling Flexsee for recommendations.
You can have multiple models (e.g. one for post-purchase, one for browse abandonment) and switch which one a flow uses later.
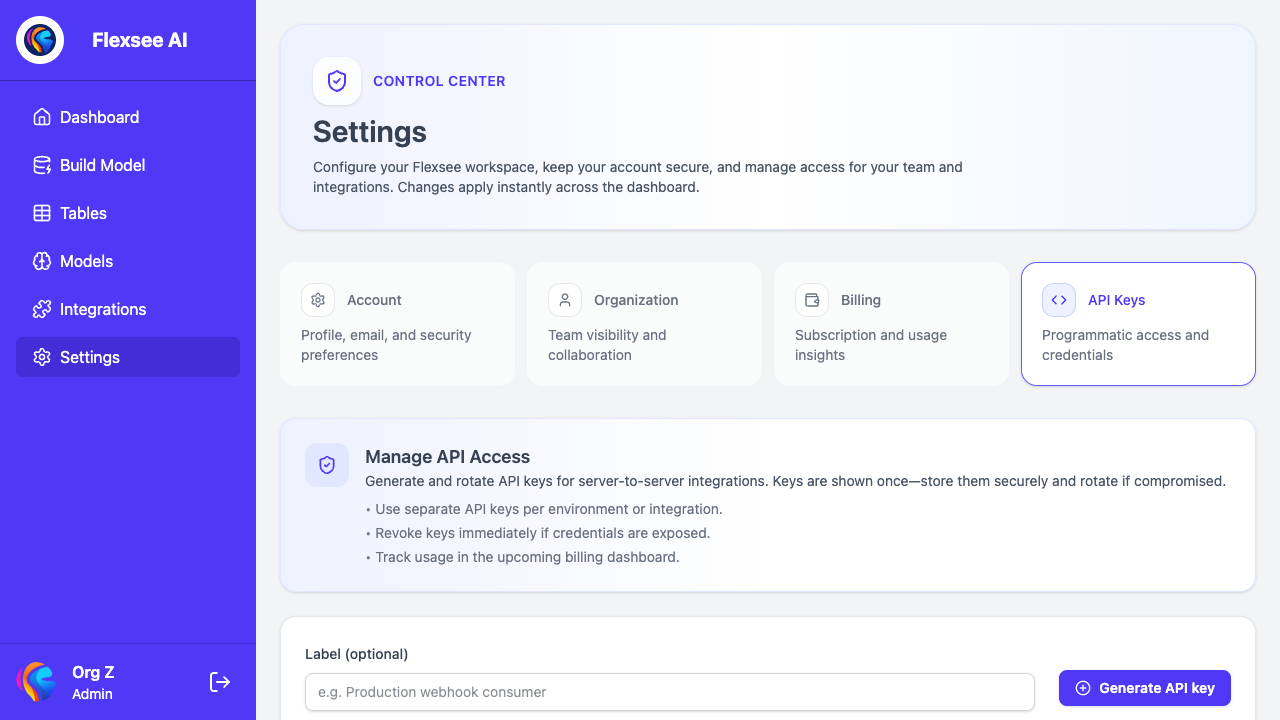
Step 3: Get a Flexsee API key and note the base URL
- In the Flexsee dashboard, go to Settings or API and create an API key.
- Copy the key and store it somewhere safe (e.g. a password manager). You’ll use it in Klaviyo to authenticate requests to Flexsee.
- Note the Flexsee API base URL (e.g.
https://api.flexsee.aior the URL shown in the docs). Klaviyo will call endpoints like/v1/recommendationsor the path shown in your Flexsee documentation.
Keep the API key secret; only use it in server-side or secure Klaviyo config (e.g. stored as a Klaviyo secret or in a private integration), not in client-side code.
Step 4: Create the “Flexsee API Placed Order” metric in Klaviyo
Klaviyo needs to know when an order has been received and processed by Flexsee so it can trigger flows (e.g. post-purchase) at the right time.
- In Klaviyo, go to Analytics → Metrics (or your integration’s metric setup).
- Create a new metric (or use an existing one) that will receive events from Flexsee. Name it something clear, e.g. “Flexsee API Placed Order”.
- Configure your backend or middleware (e.g. Flexsee webhook, your server, or a Klaviyo integration) so that when an order is placed in Shopify:
- Flexsee (or your system) processes the order.
- An event is sent to Klaviyo with the metric name you chose (e.g. “Placed Order”) and the same profile/email you use for the flow.
If Flexsee exposes a webhook or direct Klaviyo integration, follow the Flexsee docs to map “order placed” to this metric. Otherwise, use your own service to forward events from Flexsee (or Shopify) to Klaviyo.
Once this is in place, you can trigger a flow on “Flexsee API Placed Order” instead of (or in addition to) the default “Placed Order” metric.
Step 5: Clone or update your post-purchase flow in Klaviyo
- In Klaviyo, open Flows and find your Post-Purchase (or similar) flow.
- Either clone the flow or edit the existing one. Cloning is safer so you can compare before/after.
- Change the trigger to the Flexsee API Placed Order metric (or the metric you set up in Step 4).
- Open the email (or emails) in the flow and add or replace the product block with a recommendation block that calls Flexsee.
How you “add a recommendation block” depends on Klaviyo:
- If Klaviyo has a Flexsee block or app: add that block and configure the Flexsee model and API key (or connect via the app).
- If you’re using custom HTML/Liquid: add a section that calls the Flexsee API (e.g. via a Klaviyo API block, Action step, or a server-side request that injects recommendations into the email content). Use the Flexsee docs for the exact endpoint, parameters (e.g.
customer_id,order_id,model_id), and response format.
Ensure the block or request uses the same profile/email as the flow so recommendations are personalized.
Step 6: Add the recommendation content to your email template
Inside the email that sends after “Flexsee API Placed Order”:
- Insert the Flexsee recommendation block (or the custom block that calls Flexsee) where you want the recommended products to appear (e.g. “You might also like”).
- Configure number of products (e.g. 4 or 6) and layout (grid, carousel, etc.) to match your design.
- Use product fields from the Flexsee response (e.g. image URL, title, link, price) in your template, following Klaviyo’s template syntax (e.g. Liquid).
- Save the flow and the email template.
If Flexsee returns product IDs or handles, you can resolve them to Shopify product URLs and images using Klaviyo’s product catalog or Liquid so links and images work correctly.
Step 7: Test with a real order
- Use a test email that is subscribed and will receive the flow.
- Place a test order on Shopify with that email (or trigger the Flexsee “Placed Order” event for that profile in a test environment, if you have one).
- Confirm:
- The Flexsee API Placed Order (or equivalent) metric fires in Klaviyo for that profile.
- The flow runs and sends the email.
- The email contains the Flexsee recommendation block with the expected number of products and correct links/images.
- Fix any issues (e.g. wrong metric, missing API key, or template errors) and repeat until the end-to-end path works.
Step 8: Go live and monitor
- When testing looks good, activate the flow (or switch the main post-purchase flow to use the Flexsee metric and new template).
- Monitor over the next days:
- In Klaviyo: flow enrollment, open/click rates, and any flow or email errors.
- In Flexsee: API usage, model performance, and any errors or latency.
- Iterate: adjust the number of recommendations, placement in the email, or the model used based on results.
Troubleshooting
- No recommendations in the email: Check that the Flexsee API is called with the correct profile/email and that the response is mapped into your template. Verify the model is trained and the API key is valid.
- Flow doesn’t trigger: Confirm the “Flexsee API Placed Order” (or your named metric) is firing for the test profile. Check Klaviyo’s metric and flow trigger filters (e.g. not excluded by segment or timing).
- Wrong or missing products: Ensure product IDs/handles from Flexsee match your catalog and that image/URL logic in the template is correct. Check for caching or stale data.
- API errors: Use Flexsee and Klaviyo logs (or your middleware logs) to see status codes and error messages. Common issues: wrong base URL, invalid or expired API key, or rate limits.
For more detail on Flexsee’s API and Klaviyo integration options, see the Flexsee documentation and the Flexsee dashboard.